Wednesday, 29 February 2012

Chocolate Macaroons

Chocolate Macaroons
So after making a delicious batch of vanilla ice cream on Sunday I had quite a few egg whites left over. What to do? Two thoughts came to mind. The first, the anorexic Hollywood starlet staple the egg-white omelette, was instantly dismissed – no matter what ingredients you'd add it just wouldn't be as good as if it had the yolks as well. The second thought was the trusty meringue. Bit predictable. So after a quick Google search I stumbled across this chocolate macaroon recipe from Hugh Fearnley-Whittingstall, someone who I've had a lot of time for ever since I saw him make his Christmas 10-bird turducken (footage of which seems to have sadly been removed from YouTube). Anyway, these macaroons were perfect: crisp outer, with a soft and chewy middle, and a velvety ganache filling. Well done, Hugh, and not a wood pigeon or partridge in sight. Makes 12.

Ingredients:
125g icing sugar

3 tbsp cocoa

165g ground almonds

3 egg whites
55g caster sugar

¼ tsp vanilla extract

For the ganache:
100g plain chocolate, chopped into small pieces
100ml double cream

Method:
1. Heat the oven to 150C/300F/gas mark 2. Line two baking sheets with parchment. Dip a 4.5cm circular biscuit cutter or small glass into flour, and use it to mark out 24 circles on the parchment set about 3cm apart (this will make it easier to make even-sized macaroons).
2. Sieve the icing sugar and cocoa into a bowl, and whisk in the almonds. In a separate bowl, whisk the egg whites until foamy, then gradually whisk in the sugar until the mixture is stiff and glossy. Stir half the almond mixture into the egg whites, then add the rest, along with the vanilla, and fold until just combined.
3. Transfer the mixture to a plastic bag and cut a 1cm hole in the bottom. Pipe on to the baking sheets using the flour circles as your guide. Tap the sheets hard on a worktop to eliminate air bubbles.
Bake until the macaroons feel slightly firm, about 18 minutes. Remove, allow to cool slightly, then transfer on the parchment to a wire rack to cool completely.
4. To make the ganache, put the chocolate in a bowl. Warm the cream in a small saucepan until barely simmering, pour this over the chocolate, leave to stand for two minutes, then stir until the mix is smooth and cool. Spread some ganache on to half the macaroons and sandwich together with the remaining ones. Refrigerate, covered, until you're ready to serve.

Red Onion & Roasted Cherry Tomato Soup

Red Onion & Roasted Cherry Tomato Soup
Yes, yes, I know it's not tomato season so I really shouldn't be making this, but I am generally pretty good when it comes to buying seasonal ingredients (you won't see me touch an apple in the summer, for example). The thing is, it's starting to feel like spring outside and the Mediterranean flavours of this soup just remind me of warmer days (cue a sudden cold spell and all the early budding flowers being wiped out in a mass icy cull). The recipe comes from New Covent Garden Soup Company's Soup & Beyond. Serves 4.

Ingredients:
1.35kg cherry tomatoes
3 large garlic cloves, quartered
3 red onions, 2 finely sliced, 1 chopped
1 large handful basil leaves
4 tbsp olive oil
25g butter
2 tsp balsamic vinegar
2 heaped tsp dark brown sugar
salt and freshly ground black pepper
300ml boiling water

Method:
1. Preheat the oven to 190C/375F/gas 5. Place the tomatoes in a shallow roasting tin, along with the garlic and the chopped onion. Scatter over half a dozen basil leaves and season with salt and pepper. Coat well with three-quarters of the olive oil and roast for 50-60 minutes until the tomatoes are soft and beginning to brown.
2. Melt the butter and gently fry the sliced onions until they are tender and caramelised (about 10 minutes). Add the balsamic and the sugar and cook for another 2 minutes.
3. Purée the cooked tomatoes with a little water in a liquidiser or food processor and pass through a fine sieve. Add the purée and any remaining water to the onions and taste for seasoning. Tear the remaining basil leaves and stir into the soup. Reheat gently and serve.

Tuesday, 28 February 2012

Sticky Toffee Pudding

Sticky Toffee Pudding
Sticky toffee pudding is the staple gastropub dessert, and done well is an absolute delight. In fact, I would go as far to suggest that you can judge a pub's entire menu by the quality of its sticky toffee pudding. Don't believe me? Well this is exactly what I once did. In a previous life I used to work for a leading magazine for the pub trade and my then-girlfriend (who eventually became my wife) was food editor. Every year she would judge the best food pub, with the winner receiving a coveted award at a glitzy London ceremony. One year I decided to tag along on the mystery visit to each finalist, where we would stuff our faces, have a couple of drinks and generally twat about – all courtesy of our company. Basically all the finalists were of an equally high standard, so we decided that the winner should be the one that served the best sticky toffee pudding. Six calorific desserts later and a winner was found. This is the first time I've made it myself and I have to say that if The Albion Tavern had entered that year (notwithstanding that it's not an actual real pub and my girlfriend was the head judge), it would have been right up there. Serves 8.

Ingredients:
200g dried dates, stoned and chopped. Buy Medjool if you can
250ml black tea (not too strong)
½ tsp bicarbonate of soda
85g unsalted butter, softened
175g self-raising flour
1 tsp mixed spice
175g golden caster sugar
2 eggs, beaten

For the toffee sauce:
100g light muscovado sugar
100g unsalted butter
142ml carton double cream

Method:
1. Heat the oven to 180C/gas 4. Put the dates and tea in a saucepan and bring to the boil. Cook for 3-4 minutes to soften the dates. Stir in the bicarbonate of soda.
2. Beat the butter and caster sugar together with electric beaters until pale and creamy, then beat in the egg, flour and mixed spice. Fold in the date mixture and pour into a buttered ovenproof dish or brownie tin. Bake for 30-35 minutes or until the top is just firm to touch.
3. Meanwhile, make the sauce by putting the sugar, butter and cream in a pan over a low heat and simmer until the sugar has dissolved. Cook until the sauce is a lovely toffee colour. Cut the pudding into squares and serve with the warm sauce and a scoop of vanilla ice cream.

Vanilla Ice Cream

Vanilla Ice Cream
When you tell people you've churned a batch of homemade ice cream there is usually a look of genuine surprise (and envy) on their face. Once you've mastered the basic vanilla recipe below (and trust me, it doesn't take much mastering), the only limit to the flavours and textures you can add is your imagination.

Ingredients:
300ml full-fat milk
300ml single cream
1 vanilla pod
6 egg yolks
150g caster sugar

Method:
1. Pour the milk and cream into a saucepan. Slice a vanilla pod in half lengthways and scrape the sticky black vanilla seeds into the pan with the point of a knife. Drop the scraped pod in, too, then bring the mixture almost to the boil. Turn off the heat just before it boils. Leave for 30 minutes or so, for the vanilla to flavour the milk.
2. Beat 6 egg yolks and 150g caster sugar until light and fluffy. Remove the vanilla pod, then pour the liquid through a sieve into the egg yolks and sugar, stirring until you get a thin custard. Pour it into a clean saucepan.
3. Put the custard over a moderate heat and, stirring almost continuously with a wooden spoon, bring it slowly towards the boil. Once the custard is thick enough to thinly coat the back of a wooden spoon, remove it from the heat, pour it into a cold basin and leave it to cool. Once it is cool, refrigerate it for a good half hour before pouring into an ice cream machine and churning until almost frozen.

Monday, 27 February 2012

Salmon & Sweet Potato Fishcakes

Salmon & Sweet Potato Fishcakes
My boys love salmon – or pink fish as they like to call it. They've got expensive taste, what can I say? So when I saw this recipe from Lorraine Pascale from her book Home Cooking Made Easy, I didn't hesitate in giving it a bash. Now I'm sure that Lorraine is an all right sort of person in real life, but I can't get on with her presenting style when I've seen her on TV. I just don't find her at all engaging and the way she explains things just comes across as slightly smug and, well, bloody irritating. Saying that, she's pretty fit and knows how to make a damn tasty fishcake, so swings and roundabouts really. Makes 4-6.

Ingredients:
500ml vegetable or fish stock
400g sweet potato, peeled and diced
200-250g salmon fillets, skin removed and each one cut in half
large pinch of paprika
squeeze of lime juice
1 bunch of fresh chives, finely chopped
salt and freshly ground black pepper
1 egg, lightly beaten
oil, for shallow-frying

Coating:
1 egg, lightly beaten
100g dried breadcrumbs

Method:
1. Pour the stock into a pan and bring to the boil. Add the sweet potato chunks and fish and
cover with a lid. Cook for about 10 minutes until the sweet potato and salmon are cooked. Take the pan off the heat and drain well.
2. Return the fish and sweet potato back to the pan, add the paprika, lime juice, chives, salt and pepper and the beaten egg, then mash. Take some mixture and form it into a fishcake shape – this should make 4-6, but it depends on the size you want them.
3. For the coating, put the lightly beaten egg in one bowl and the breadcrumbs in another. Dip a fishcake into the egg, spooning the egg all over and flipping it so the fishcake is completely covered, then dip it in the breadcrumbs. Repeat with the other fishcakes. Put in the fridge for an hour or so before frying as they will hold their shape better.
4. Heat the oil in a frying pan and shallow-fry for 2-3 minutes each side.

Tomato Ketchup

Tomato Ketchup
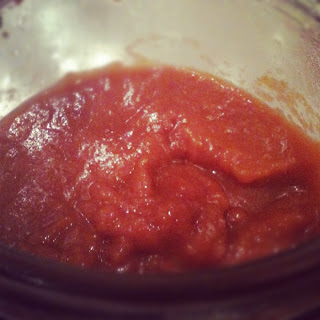
I'm not going to bang on about how tomato ketchup played a pivotal part of my childhood, because it didn't, to be honest. I've never been a massive fan and only ever really have it on a bacon sarnie. However, I was making some salmon fishcakes and wanted a tomato-based sauce as an accompaniment. This packs a real kick from the chilli, so might be a bit strong for kids.

Ingredients:
1 tbsp olive oil
2 onions, chopped
1 thumb-size piece fresh root ginger, finely chopped or grated
2 garlic cloves , chopped
1 red chilli, deseeded and finely chopped
800g tomatoes, briefly whizzed in a food processor or finely chopped
100g dark brown sugar
100ml red wine vinegar
2 tbsp tomato purée
1 tsp coriander seeds, crushed

Method:
1. Heat the oil in a large, deep pan, then fry the onions, ginger, garlic and chilli for 10-15 mins until soft. Add the remaining ingredients and some seasoning, then boil for 30 mins, stirring occasionally, until the mixture has thickened and is sticky.
2. Cool slightly, then whizz in a blender or food processor until smooth. If the sauce is a bit thick for your liking, stir in a dribble of boiling water. Sieve, then funnel into a bottle or jar while still hot. Cool completely before serving. Will keep for 3 months in the fridge.

Wednesday, 15 February 2012

Chocolate & Beetroot Cake

Chocolate & Beetroot Cake
The Albion Tavern took part in a Valentine's Day cake sale recently, all in aid of the charity FSID (details of which can be found by clicking the link on the top right of the home page). I'd had some appreciative comments about some Beetroot & Choc Chip Cupcakes I'd made before, so thought I'd take the theme to the next level. I'd seen this recipe, courtesy of Delicious magazine, when researching the use of beetroot in cake and knew that this would be the one to make. It didn't disappoint, as you can see from the picture above – moist, spongey, deliciously chocolately with just a background hint of sweet beetroot. Previous experience told me that beetroot loses its vibrant colour when baking, so I added a couple of drops of red food colouring to the batter. I'd probably add a couple more next time. As to the sale, well the cake was a hit, despite scepticism from the odd taste-deficient philistine, and it was gone in an hour. I think I got about 16 slices from it, but of course you can be more generous/greedy.

Ingredients:
250g plain chocolate, broken up
3 large free-range eggs
200g light muscovado sugar
100ml sunflower oil
1 tsp vanilla extract
100g self-raising flour
½ tsp bicarbonate of soda
½ tsp baking powder
50g ground almonds
250g raw beetroot
2-3 drop red food colouring

For the icing
150g plain chocolate
100g icing sugar
100g soured cream

Method:
1. Preheat the oven to 180C/fan160C/gas 4. Grease a 22cm round, loose-bottomed cake tin with a little butter and line the base with baking paper.
2. Place the plain chocolate in a bowl and set over a pan of gently simmering water. Allow the chocolate to melt slowly until smooth, then set aside to cool.
3. Place the eggs, sugar and sunflower oil in a large mixing bowl and whisk together, using an electric hand whisk, for about 3 minutes until the mixture is smooth and creamy. Stir in vanilla extract, then sift over self-raising flour, bicarbonate of soda, baking powder and gently fold in, together with the ground almonds.
4. Using a pair of rubber gloves to protect your fingers from staining, peel and grate the beetroot, then squeeze out the excess liquid. Fold the beetroot into the mixture with the cooled chocolate, until thoroughly mixed.
5. Pour the mixture into the prepared tin and bake for 50 minutes-1 hour. Cover with foil if the cake browns too quickly. Test the cake by inserting a skewer into the centre to see if it comes out clean. Cool for a little while, then remove from the tin and leave to cool completely on a wire rack.
6. For the icing, place 150g plain chocolate in a bowl set over a pan of gently simmering water. Allow to melt gently until smooth. Set aside to cool, then beat in icing sugar and soured cream until you have a thick, creamy and spreadable icing. Spread it over the top and sides of the cooled cake and serve.

Tuesday, 14 February 2012

Fish, Chips & Mushy Peas

Fish, Chips & Mushy Peas
So I've had this deep-fat fryer for six and a bit years – willingly bought with wedding vouchers if you must know – and I've never used it. It's one of those mini industrial-looking ones and really called out to me to buy it when I first saw it. If I wasn't with my wife of a couple of weeks at the time I would probably have eloped. Now, I don't really understand what was behind this odd infatuation. Sure, I like chips, who doesn't, but frying your own just seems so antiquated. I mean, there's nothing wrong with oven chips – less fat, less smell, less chance of burning your house down – and if I really wanted that authentic "Chip Shop Experience", I'd go to, wait for it, the chip shop. So there it sat, first gleaming along with other newly bought appliances on the worktops, then in its box, then in its box under the stairs. Until last Saturday, that is, when it was unearthed in preparation for my first foray into chip frying.
The first thing was to fill the bugger (oh, how fickle love is) with the minimum four litres of sunflower oil. Four litres. Four. Litres. The second was to do some research into cooking the perfect chip. What potato, what oil (damn, should have read this first), twice fry, thrice fry (Heston being his usual "must outdo everyone else" self. Only surprised he didn't inject each chip with chicken liver parfait), to parboil or not. The third was what accompaniment. Gotta be fish, and for my debut I really wanted to cook cod as that is the daddy. But isn't it endangered or something? Maybe I should go for something else. Haddock? Pollock? Bollocks. Tough titty, my fishy friend, I'd buy sustainable, line-caught cod to ease my tortured conscience and chuck a quid into the next Greenpeace collection I see.
Oh, and then there's the batter. Gotta be beer, but which beer? Does it even matter? And you must have mushy peas as well. By now I was seriously considering giving up and heading off to the nearest chippie to drown my sorrows in a vat of vinegar. But no, one trip to the supermarket later and I was set, six-plus years of pent-up lust about to be unleashed in a torrent of hot oil. Serves 4.

Chips
Before the first fry
This is the method I went for. I'm not going to lie, it takes a bit of time and is nothing like whacking a tray of McCains into the oven. The result was pretty good – a lovely golden colour, floury in the middle and slightly crisp. If I'm being fussy, they could have been a bit crispier, so I guess the secret is getting the chips really, really dry after each stage of the process. Instead of sunflower oil you could use dripping or animal fat instead – don't forget I need four litres of the stuff, though. Never going to happen.

Ingredients:
250g Maris Piper potato per person

Method:
1. Peel the potatoes and cut into chips. Soak in a bowl of cold water for 1 hour, then drain.
2. Put the chips into a pan of cold, salted water and bring to the boil. Simmer for a couple of minutes until just soft.
3. Drain, pat dry and allow to cool before putting them in the fridge until cold.
4. Heat your oil to 120C (use a thermometer if you don't have a temperature control) and add the chips in batches. Cook for about 5 minutes until cooked but not coloured.
5. Drain, pat dry and refrigerate again.
6. Heat the oil to 160C and add the chips. Cook until crisp and golden, drain and serve.

Fish
Wow. Just wow. This was amazing and probably the best battered fish I've ever had – and I grew up by the sea so this is saying something. I used a Jamie Oliver recipe for the batter, although I added slightly more of my beer of choice, John Smith's, to get the right consistency. The result after frying was ridiculously crispy, golden batter and perfect, soft fish.

Ingredients:
4 x 225g white fish fillets
1/2 tsp salt
1 tsp black pepper
225g plain flour, plus extra for dusting
285ml cold beer
3 heaped tsp baking powder

Method:
1. Heat the oil to 190C. Season the fish on both sides with salt and pepper and dust each with flour.
2. Whisk the flour, beer and baking powder together until thick and shiny. The texture should be like semi-whipped double cream.
3. Dip the fish into the batter and allow excess to drip off. Carefully lower into the fryer and cook for 4 minutes until golden and crisp.

Mushy Peas
Mushy Peas
Another Oliver recipe, very simple.

Ingredients:
knob butter
4 handfuls peas
small handful mint, leaves picked and chopped
squeeze lemon juice
sea salt and ground black pepper

Method:
1. Put the butter in a pan with the peas and mint. Cover and simmer for 10 minutes. Add lemon juice and season. Mash.

Monday, 13 February 2012

Raspberry & Cream Cupcakes

Raspberry & Cream Cupcake
Not a lot needs to be said about these stunning cupcakes perfect for a Valentine's Day loved one. The original recipe said makes 12. I used mahoosive muffin-style cases and managed to fill 8. They were big.

Ingredients:
180g butter, softened
180g caster sugar
2 free-range eggs
3-4 tbsp milk
180g plain flour
1 heaped tsp baking powder
150g/5oz raspberries

For the icing:
125g butter, softened
250g icing sugar
1 tbsp milk
small drop red food colouring
12 raspberries

Method:
1. Preheat the oven to 180C/350F/gas 4. Line a 12-hole muffin tin with paper cases.
2. Whisk the butter and sugar until pale and creamy. Whisk in the eggs one at a time, then add the milk. Add the flour and baking powder and carefully fold in. Add more milk, if necessary, to get the mixture to a soft drop consistency.
3. Put one spoonful of the mixture into the cases, then follow with 2-3 raspberries, and another spoonful of mixture.
4. Bake for 15-20 minutes, or until risen and golden brown. Remove from the oven and set aside to cool for 10 minutes.
 

5. Meanwhile, for the icing, beat the butter in a bowl until light and fluffy. Carefully stir in the icing sugar and continue to beat for five minutes. Beat in the milk and food colouring.
6. Decorate the cupcakes with the icing and top each cupcake with a raspberry.

Wednesday, 8 February 2012

Halloumi with Vegetable Couscous, Baba Ghanoush and Hummus

Halloumi with Vegetable Couscous, Baba Ghanoush and Hummus
It's bloody freezing outside. There's snow on the ground, you've got to wrap up so warm it takes half an hour to leave the house, and once you're outside the wind is so icy that you just want to get back inside and hibernate until June. Don't get me wrong, I like the idea of winter – dark nights, snow, warming food – it's just that by February I'm a little bored of root vegetables and my skin looking like it's been attacked with a cheese grater. That's why it's good to look ahead to warmer, sunnier times with this Mediterranean-inspired dish. There's a lot to it, so I'll split it into three:

Halloumi with Vegetable Couscous (serves 4)
Halloumi is a truly brilliant cheese, but reminds me of one of those girls you used to meet at student parties. You know, sober she would be deathly dull, would only talk about cats or the church and would be dressed ready for her Saturday job in a library. But a couple of cheeky glasses of cheap, value plonk later and she'd be dancing on the table, flinging her top round her head like there's no tomorrow and getting ready to stick her tongue down the gob of the next boy she'd see (unfortunately – or maybe fortunately – that boy would rarely be me). Halloumi is the sober girl when uncooked – conservative and boring – but introduce it to a hot grill pan, and by Christ it turns into a sexy, sozzled animal that is just screaming out to tickle your tonsils.

Ingredients:
200g couscous
2 tbsp olive oil, plus more brushing the halloumi
1 onion, finely chopped
2 cougette, sliced
1 red pepper, chopped
4 plum tomatoes, diced
juice of 1 lemon
50g mint, chopped
salt and pepper to taste
2 x 250g packs halloumi, each sliced into 8 pieces
good pinch of smoked paprika

Method:
1. Add couscous to a pan of 500ml boiling water. Take off the heat and leave to stand for 10 minutes for the water to be absorbed. Pour into a large bowl and fluff up with a fork.
2. Heat the oil in a frying pan. Add the onions and courgette and lightly brown. Add the pepper and tomato then stir into the couscous. Add the lemon juice and mint and season.
3. Heat a grill pan and lightly brush the halloumi slices with olive oil. Sprinkle with paprika and cook for a couple of minutes each side.

Baba Ghanoush (serves 4)
Baba Ghanoush
I just love saying the name baba ghanoush, although it does sound a little like an evil African dictator from the 1970s. When roasting the aubergines, make sure the skin is well blackened – the secret to good baba ghanoush is the slightly charred flavour.

Ingredients:
2 large aubergines
3 garlic cloves, crushed
1.2 tsp ground cumin
80ml lemon juice
2 tbsp tahini
pinch cayenne pepper
1 1/2 tbsp olive oil
1 tbsp flat-leaf parsley, chopped

Method:
1. Preheat oven to 200C/400F/gas 6. Prick the aubergines several times with a fork and blacken over an open flame for about 5 minutes. Transfer to a baking dish and cook for 40-45 minutes until charred and soft.
2. Allow to cool, then peel off the skin. Place the flesh in a food processor with the garlic, lemon, tahini, cumin, cayenne and olive oil, and blitz until smooth and creamy. Season with salt and stir in parsley.


Hummus (serves 4)
Hummus
Forget that stuff you buy in plastic tubs at the supermarket. Once you taste homemade hummus – and see how quick and easy it is to make – you'll never buy that thick, tasteless crap again. Good hummus should be bursting with garlic, lemon and sesame from the tahini, with a suggestion of background heat from the cayenne. It should also be a looser consistency as well – honestly, some of the mass-produced stuff you can buy can be used to grout the bathroom.

Ingredients:
1 can chickpeas in water
2 tbsp tahini
4 garlic cloves, crushed
2 tsp ground cumin
80ml lemon juice
1 1/2 tsp salt
large pinch cayenne pepper
3 tbsp olive oil
paprika to garnish

Method:
1. Drain the chickpeas, reserving the liquid. Place in a food processor with the tahini, garlic, lemon, cumin, cayenne, salt and olive oil, and blitz until creamy and smooth.
2. With the motor running, add enough of the reserved chickpea liquid to form a smooth, creamy purée.
3. Pour into a bowl and sprinkle with paprika.

Speckled Chocolate Shortbread

Speckled Chocolate Shortbread aka Leopard Biscuits
First attempt at making shortbread and another tick in the box marked "success". The recipe comes from The Great British Bake Off How to Bake cookbook and at this rate I'll have completed the whole thing by Easter (and be about 4st heavier). My oldest boy, Tom, instantly renamed the shortbread Leopard Biscuits – and then scoffed a couple without breathing. Oh, and a quick tip (mainly for numpties like me). When leaving a new block of butter on the radiator to soften for a couple of minutes, don't get distracted and come back three hours later to find it in a puddle on the floor. Oh, and quick tip No.2 (seriously, what a numpty day I had). Grate the chocolate into a bowl and not on a plate, as the slightest blast of air (maybe from an oven, for example) will blow most of it all over the kitchen... Makes 20.

Ingredients:
200g unsalted butter, softened (see top tip, above)
1/2 tsp vanilla extract
100g caster sugar
260g plain flour
40g rice flour or cornflour
good pinch of salt
50g well-chilled, 70% dark chocolate, grated (see top tip No.2, above)

Method:
1. Beat the soft butter in a bowl with a wooden spoon or electric mixer until creamy. Add the vanilla and stir in.
2. Gradually beat in the sugar and continue until the mixture is light and fluffy.
3. Sift the flours and salt into the bowl and work with your hands until thoroughly combined. I had to add just a touch of water to stop it being too crumbly.
4. Form the dough into a log shape about 20cm long and wrap in clingfilm. Chill for 20 to 30 minutes until firm.
5. Preheat the oven to 170C/325F/gas 3 and line 2 baking trays with lightly greased baking paper.
6. Unwrap the log and slice into 20 rounds with a sharp knife. Space out on the baking trays and carefully sprinkle the tops with the grated chocolate.
7. Bake for 20 minutes or until firm but not coloured. Remove from the oven and leave on the trays for a couple of minutes to further firm up. Transfer to a wire rack and leave to cool.

Tuesday, 7 February 2012

Cheese Scones

Cheese Scones
Regular reader, contributor, baker and runner extraordinaire, Anna, has been waxing lyrical about cheese scones to me for some time. I have to say that I tend to fall in the sweet camp when it comes to scones, but thought I'd give their cheesy, savoury cousin a bash. The verdict? Two content boys and one happy dad. Makes 10-12 scones.

Ingredients:
225g self-raising flour
1 tsp baking powder
50g soft margarine
1 tsp mustard powder
1/4 tsp salt
pinch cayenne pepper
100g grated cheese
1 egg
milk

Method:
1. Preheat the oven to 220C/425F/gas 7 and lightly grease two baking sheets.
2. Put the flour and baking powder in a bowl and add the margarine. Rub in with you fingers to resemble fine breadcrumbs. Stir in the mustard powder, salt, cayenne and cheese.
3. Crack the egg in a measuring jug and lightly beat. Add milk to the egg to make up 150ml. Stir into the flour mix to form a soft dough. Turn onto a lightly floured surface and knead gently. Roll or flatten out with you hand to 1.25cm thickness.
4. Cut into rounds with a fluted 6.25cm cutter to make 10 to 12 scones. Space out onto the baking sheets and brush the tops with milk. Bake for 10 minutes until golden brown (you may need to rotate the sheets for an even bake).
5. Leave to cool on a wire rack.

Monday, 6 February 2012

Toad in the Hole with Red Onion Gravy

Toad in the Hole
To celebrate National Yorkshire Pudding Day on February 5 – a day, along with National Curry Day, National Full English Breakfast Day and National Bread & Butter Pudding Day (might have made those up, not sure), well worth honouring – I decided to make another British classic, Toad in the Hole. Now, for all you immature readers out there (and I'll admit to being slightly disappointed if there weren't one or two) I'm about to say the word "batter". Batter. There, I've done, so come on, stiffle those giggles and let's be grown-up about this. Yorkshire pudding is ridiculously easy to make and there really is no excuse for limp sausages swimming in soggy batter (seriously, I can end this post right now). The key is making sure you let your batter (see, that's better) rest for a while and that your baking tray has plenty of smoking hot oil in it before adding your mixture. Oh, and don't forget to buy some decent sausages for this – I made another trip to Jamie Oliver's Barbecoa butchery near St Paul's in London and bought these very generous Cumberland beauties.


You can see just by looking at them that they are going to taste amazing – and they didn't disappoint. Serve with creamy mash, peas or greens and the red onion gravy. Serves 4.

Ingredients:
sunflower oil
8 large sausages
4 sprigs rosemary
2 large red onions, peeled and sliced
2 cloves garlic, peeled and thinly sliced
2 knobs butter
6 tbsp balsamic vinegar
1 level tbsp good-quality vegetable stock powder

For the batter:
285ml milk
115g plain flour
pinch of salt
3 eggs

Method:
1. Whisk the batter ingredients together and set to one side.
2. Heat the oven to 240C/475F/gas 9. Pour 1cm oil into a baking tray then place this on the middle shelf of the oven. Place a larger tray underneath to catch any oil that overflows.
3. When the oil is very hot add the sausages. Keep an eye on them and allow to cook until lightly golden.
4. Carefully take the tray out of the oven and pour the batter over the sausages. Add 3 sprigs of rosemary and return to the oven. Don't open the oven for at least 20 minutes. Remove when Yorkshire pudding is golden and crisp.
5. For the onion gravy, fry the onions and garlic in butter over a medium heat for about 5 minutes until soft and translucent. Add the remaining sprig of rosemary.
6. Add the balsamic vinegar and allow to reduce by a half.
7. Add stock powder and enough water for a nice rich consistency. Simmer gently until Toad in the Hole is ready to serve.

Friday, 3 February 2012

Honey & Walnut Flapjacks

Honey & Walnut Flapjacks
I've always been partial to a generous slice of flapjack. There's something very comforting about the warm, gooey texture – and if you ignore all the sugar, butter, honey, butter, honey, sugar, butter, well then it's basically just wholesome oats, so they're pretty good for you, too. This version comes from Robin Tarver, head chef at the Royal Exchange in London. It has the welcome addition of toasted pumpkin seeds and walnuts, so it's even more wholesome and healthy – go on, have a second slice as well. Makes 12 squares.

Ingredients:
200g honey
200g demerara sugar
200g butter
300g oats
100g pumpkin seeds, toasted
100g walnuts, chopped and toasted

Method:
1. Preheat oven to 180C. Melt the sugar, honey and butter over a low heat.
2. Gently toast the pumpkin seeds and chopped walnut in a dry frying pan for about 5 minutes.
3. Add to the melted butter, honey and sugar and stir well. Spread evenly onto a baking tray lined with greaseproof paper and bake for 15-20 minutes until soft in the middle and sticky on the edge.
4. Allow to cool in the tray before carefully turning out and dividing into 12 equal portions.

Thursday, 2 February 2012

Chicken & Barley Broth

Chicken & Barley Soup
You've carved and eaten your roast chicken, now make the soup. Honestly, this will be better than anything you will buy in a carton or can, and really takes little effort to make. Oh, and the smell of it cooking in the kitchen is one of the true wonders of the world. As I write this it's bloody freezing outside. Seriously, think of a hot, steaming bowl of homemade chicken soup, maybe a hunk of homemade bread – guaranteed to cure/prevent any cold. Guaranteed. (I'd just like to point out before I get sued, that I have zero medical qualifications). Serves 3-4.

Ingredients:
1 chicken carcass
1 large onion, peeled and halved
1 large carrot, peeled and cut into chunks
1 stick celery, peeled and cut into chunks
1 bay leaf
100g pearl barley or soup mix, soaked in water overnight
salt and pepper
water to cover

Method:
1. Place all the ingredients except soup mix in a large pan. Season and cover with water and bring to the boil, spooning off any scum.
2. Cover and simmer on a low heat for 2-3 hours (the longer the better).
3. Strain the liquid into a separate pan, mashing the carcass and veg to extract all flavour. Add any pieces of chicken left on the carcass (this should fall off with ease).
4. Return liquid to the heat and add the barley. Bring to the boil and simmer for 40 minutes until barley is cooked. Check seasoning and serve.

Perfect Roast Chicken

Perfect Roast Chicken
Bit of a back to basics this one, but this is really an idiot-proof guide – adapted from Jamie Oliver – to cooking the perfect roast chicken, which inexplicably can cause problems to the amateur chef. There really is no excuse for a dry, over-cooked bird and 1 hour 20 minutes is all it takes for a succulent roast. And forget all about covering it with bacon or making a tinfoil tent or any of that nonsense. Well seasoned with a lemon and some herbs stuck up its arse – and a bit of TLC – is all a chicken needs. A decent 1.5kg bird will easily feed a family of four with leftovers, and don't forget to use the carcass to make delicious chicken soup – please don't chuck it in the bin, you daft buggers. Serves 4 (easily).

Ingredients:
1 1.5kg chicken, preferably free-range
1 lemon
olive oil
salt and pepper
handful herds, such as thyme or rosemary

Method:
1. Take the chicken out of the fridge 30 minutes before it goes into the oven.
2. Preheat oven to 240C/475F/gas 9.
3. Drizzle the chicken with olive oil and season well with salt and pepper, rubbing it all over the bird.
4. Carefully prick the lemon all over, using the tip of a sharp knife (if you have a microwave, you could pop the lemon in these for 40 seconds at this point as this will really bring out the flavour).
5. Put the lemon inside the chicken’s cavity, with the bunch of herbs.
6. Place the chicken in the roasting tray and put it into the preheated oven.
7. Turn the heat down immediately to 200C/400F/gas 6 and cook the chicken for 1 hour and 20 minutes.
8. Baste the chicken halfway through cooking.
9. When cooked, take the tray out of the oven and transfer the chicken to a board, cover with tinfoil and allow to rest for 15 minutes or so.